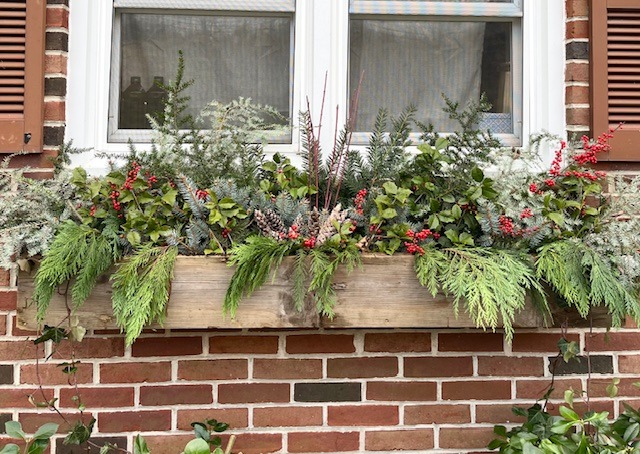
This beautiful Winter window box will bring lovely color and holiday cheer to the outside of your home!
With frost being very much prevalent in the mornings, my fall window box has come to an end. With that being said, it is time to upgrade it a bit and get it ready for the holiday season. If I am being completely honest, I'm just not a huge fan of winter. I don't like how everything goes dormant for the next few months. Although, this Winter window box has made me a little more excited about the season to come.
A huge bonus about this window box is that it is not expensive. Mine was completely free because I have very generous parents and grandparents that let me clip things off of their property. Although, greens are not too expensive, and I am sure things can be found outside around public parks and other areas like that. No one said the greens have to be real. If it is easier and more cost effective to use artificial ones, then do it! No one will know, it'll be our little secret!
For my clippings, I have a variety of greens that consist of blue spruce that have little pinecones on them, cypress clippings, holly, and red berries. A fun fact I recently found out is that cypress will not drop in your home the way pine trees would, so they are great to decorate with if you want less mess! Also, I included a few pinecones in this box as well. I feel like they make it feel a little more wintery and bring out the berries.
For this window box, I wanted to include all of those varieties to have as much color as I could. After all, there isn't much color this time of year. I also wanted a variety of different textures. There may not be any flowers in it or many options of things to add in but that doesn't mean it has to be lacking color, texture, and variety.
For the bottom of the window box, I kept in my old dirt from the fall plantings to help the greens stay in better. Plus, I will definitely be using that dirt next year. I also kept in the ivy from my fall plantings. It blended in well with the other greens.
Supplies You Will Need
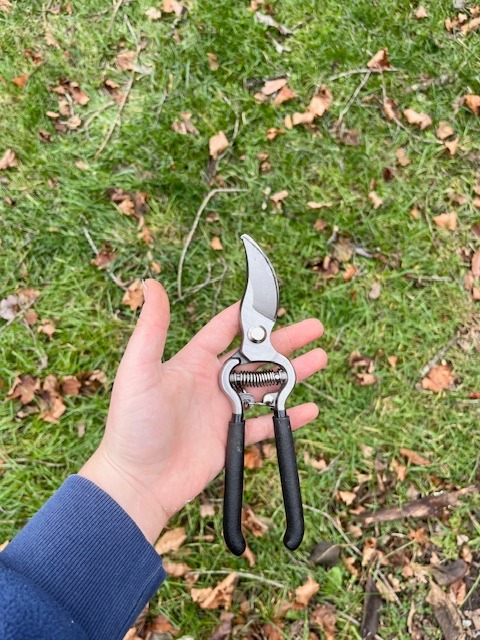
I use these clippers throughout the whole process. They are great for cutting the greens and honestly outdoor work in general. I got mine from tractor supply for about $11. The ones I linked are a little pricier because I couldn't find my exact ones.
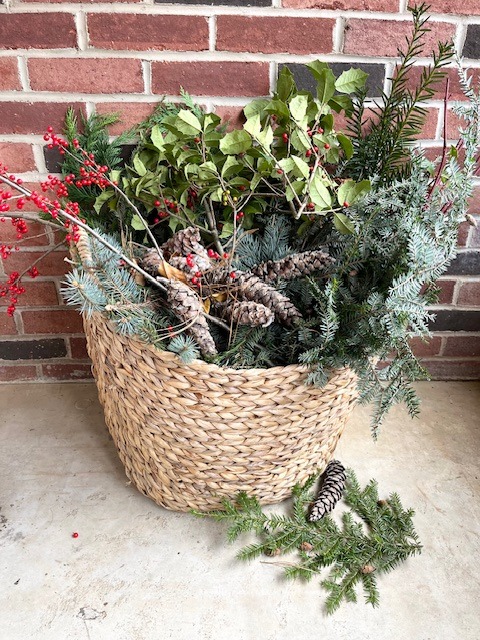
You'll also need a basket full of your favorite greens and berries. Here is where you can have fun and really choose whatever kinds you would like. Personalize it to your liking!
Other Great Additions
Dried hydrangeas - Dried hydrangeas would be such a fun addition into a winter window box. It would add great texture into the box and also help it look nice and full.
Ribbon - Festive ribbon weaved throughout the greens or going across the box itself would be beautiful as well!
Lights - Lights would also make it even more festive and also give it a little bit of a pop in the evening.
Building The Window-Box

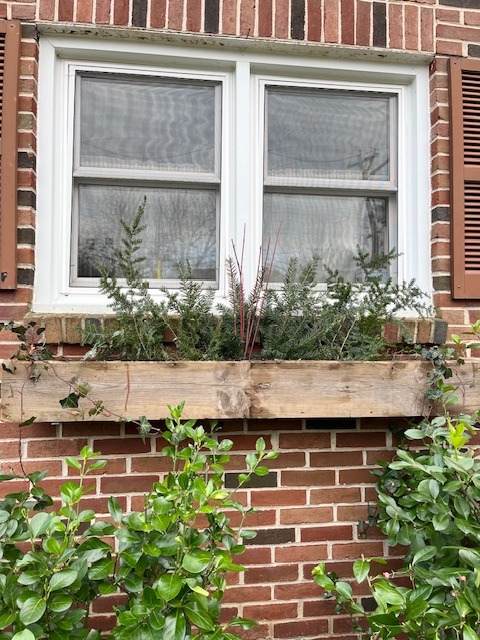
To start, I added in these red twigs for the center of the box. They added great height and also acted as a focal point. Secondly, I added in a thick green all around it to make the red of the twigs stand out even more. Creating a window box is something you have to just trust the process with and be a little patient. Personally, I can struggle with that. Although, just look at the before and after and you'll see why trusting the process is important. It'll come together with time!
I continued to work from the center out, adding in the differing greens and cutting them at different heights. A thinner one is on the very outer part of the window box at this point. They added some wispiness to the box!

My favorite part of creating this window box was adding in the cypress. I feel like it really started coming together at this point. Cypress is just so beautiful, and I love how it falls down over the box. It really gave it character.
Here, I added in blue spruce. This helped brighten up the box with its lovely color and helped the box become fuller because of how thick it is!

Then, I added in some red berries and holly. This really helped it look like a festive window box. The holly is a classic holiday staple. Also, the berries are a deep beautiful, red that remind me so much of Christmas.

Lastly, I added some pinecones into the front. I feel like they helped the berries pop even more! At this point, it is good to take a step back and examine your window box. Then, add in whatever you feel like it needs yet. I added in some things here and there as needed.

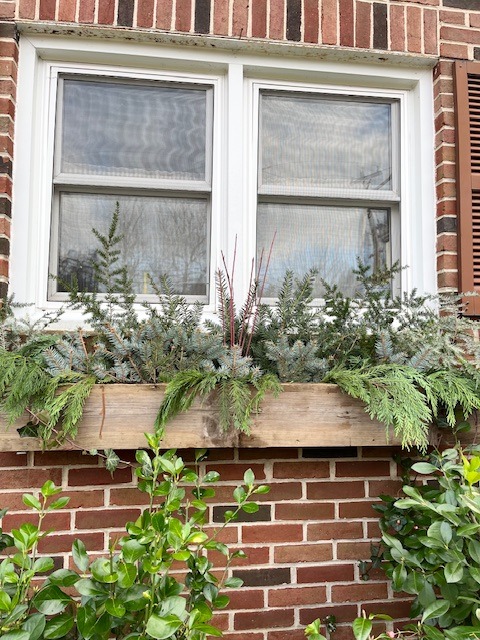
Here is the completed window box. Full of different shades of greens, reds, and different textures. I also cut the bushes below my window box to help it stand out a bit and have separation, so they weren't bleeding together.
If you use this post for inspiration to create your own window box, we would love to hear about it! As well as see pictures of your beautiful creation.
More From the Ladies at Brick House on Green
Ways To Decorate Your Home With Dried Citrus
Homemade Greek Yogurt Chicken Salad Sandwiches on Sourdough
Prayers for the Homemaking Wife
Make Your House Smell So Good With This Simmer Pot
Be sure to subscribe to our email list as well if you would like to get all the updates from us! We have a lot of fun things coming to you this Christmas season!


Leave a Reply